Free Knitting Resources

 RSS Feed

  1. flat ribCast on 29 stitches.

    Row 1: *(knit 1, purl 1) – repeat from * to last stitch, knit 1.

    Row 2: *(purl 1, knit 1) – repeat from * to last stitch, purl 1.

    Row 3: *(knit 1, purl 1) – repeat from * to last stitch, knit 1.

    Row 4: *(purl 1, knit 1) – repeat from * to last stitch, purl 1.


    Row 5: knit 1, purl 1, knit 1, purl 1, knit 5, purl 1, knit 4, purl 1, knit 4, purl 1, knit 5, purl 1, knit 1, purl 1, knit 1.

    Row 6: purl 1, knit 1, purl 1, knit 1, purl 5, knit 1, purl 4, knit 1, purl 4, knit 1, purl 5, knit 1, purl 1, knit 1, purl 1.


    Rows 5 and 6 form the pattern – repeat 21 times.

    Then work  –

    Row 29: *(knit 1, purl 1) – repeat from * to last stitch, knit 1.

    Row 30: *(purl 1, knit 1) – repeat from * to last stitch, purl 1.

    Row 31: *(knit 1, purl 1) – repeat from * to last stitch, knit 1.

    Row 32: *(purl 1, knit 1) – repeat from * to last stitch, purl 1.

    Cast off.


    I use double knitting 100% acrylic yarn for all my knitting work.  If you are using pure wool, or a wool mix you will need more as the yarn is heavier.


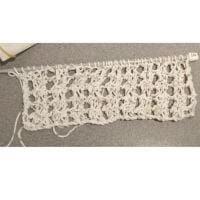
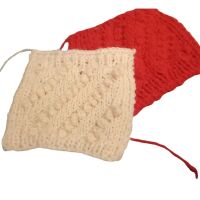
  2. ribbon stitch square

    You will need:

    Cotton yarn – or a cotton / acrylic mix

    6mm knitting needles – you can go larger if you want a more lace effect

    This is a reworking from a pattern I saw by Naomi Parkhurst while looking for an open work mesh.  I have simplified the method for you to follow.

    Cast on stitches in multiples of 4.

    Row 1: *knit 2 stitches together, yarn round needle twice, knit 2 stitches together – repeat from * to end of row.

    Row 2: *knit 1, (knit 1, purl 1) in yarn round needle loops, knit 1 – repeat from * to end of row.

    Row 3: knit.


    Cast on 40 stitches will give you 10”

    Cast on 160 stitches and work to cover a door in the summer – they look amazing – you get the fresh breeze and it keeps the bugs out.

    Take one step further –

    -       Using the maths you can create any length curtain – work a narrow café frill – or a whole door curtain.

    -       Use the same technique to make a shawl – or a scarf.

    -       Make a top by sewing into a tube and adding straps.


    This pattern is part of The Kitten and The Goat Monthly Virtual Knitting Circle.  Sign up to our email list on the website to get a newsletter with a free pattern and access to 2 videos every month.


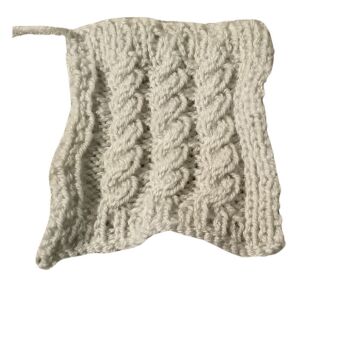
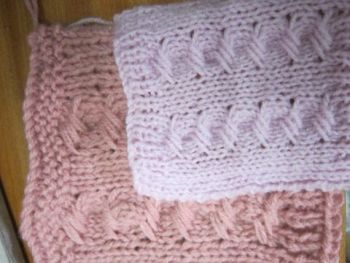
  3. cables 1

    This is part of our monthly Blanket Club.  Patterns are released every month on the website – then published in a booklet after a year.

    The squares worked in DK measure about 4 ½” square – and the larger ones 8” square.  You could use 3 strands of DK together – working on 8mm knitting needles – and the square will be bigger.

    You will need;

    1 strand of double knitting to be worked on 4mm knitting needles – about 12g

    Or 2 strands of double knitting (equal to chunky weight yarn) to be worked on 6mm knitting needles – about 20g

     If you are using the double knitting weight of yarn, then use 2 strands together throughout.

    • If you are using the chunky weight of yarn, then use 1 strand throughout.
    • Remember to count all the rows as you work up the square.

     Cast on 28 stitches.

    Row 1: *(knit 1, purl 1) – repeat from * to end.

    Work row 1: 3 more times


    We are going to cross over some of the stitches to make the twisted cable pattern.

    -       Cable 4 back - take next 2 stitches off the left hand needle onto your cable needle – tuck the cable needle with the stitches on it BEHIND the work – knit next 2 stitches on the left hand needle – put the 2 stitches from the cable needle back onto the left hand needle – knit these 2 stitches.


    Row 5: knit 1, purl 1, knit 1, purl 3, knit 4, purl 2, knit 4, purl 2, knit 4, purl 2, knit 1, purl 1, knit 1, purl 1.

    Row 6: knit 1, purl 1, knit 1 purl 1, knit 2, purl 4, knit 2, purl 4, knit 2, purl 4, knit 3, purl 1, knit 1, purl 1.

    Row 7: knit 1, purl 1, knit 1, purl 3, cable 4 back, purl 2, cable 4 back, purl 2, cable 4 back, purl 2, knit 1, purl 1, knit 1, purl 1.

    Row 8: knit 1, purl 1, knit 1, purl 1, knit 2, purl 4, knit 2, purl 4, knit 2, purl 4, knit 3, purl 1, knit 1, purl 1.


    These 4 rows form the pattern.

    Repeat the set 5 more times.


    Row 30: *(knit 1, purl 1) – repeat from * to end.

    Repeat last row 3 times more.

    Cast off.

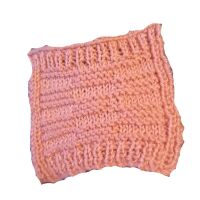
  4. garter stitch squaresGarter Stitch Blocks

    Cast on 29 stitches.

    Row 1: *(knit 1, purl 1) – repeat from * to last stitch, knit 1 end.

    Row 2: *(purl 1, knit 1) – repeat from * to last stitch, purl 1 end.

    Row 3: *(knit 1, purl 1) – repeat from * to last stitch, knit 1 end.

    Row 4: *(purl 1, knit 1) – repeat from * to last stitch, purl 1 end.


    Row 5: knit 1, purl 1, knit 1, purl 1, knit to last 4 stitches, purl 1, knit 1, purl 1, knit 1.

    Row 6: purl 1, knit 1, purl 1, knit 1, knit to last 4 stitches, knit 1, purl 1, knit 1, purl 1.

    Row 7: knit 1, purl 1, knit 1, purl 1, knit to last 4 stitches, purl 1, knit 1, purl 1, knit 1.

    Row 8: purl 1, knit 1, purl 1, knit 1, purl 7, knit 7, purl 7, knit 1, purl 1, knit 1, purl 1.

    Row 9: knit 1, purl 1, knit 1, purl 1, knit to last 4 stitches, purl 1, knit 1, purl 1, knit 1.

    Row 10: purl 1, knit 1, purl 1, knit 1, knit to last 4 stitches, knit 1, purl 1, knit 1, purl 1.

    Row 11: knit 1, purl 1, knit 1, purl 1, knit to last 4 stitches, purl 1, knit 1, purl 1, knit 1.

    Row 12: purl 1, knit 1, purl 1, knit 1, knit 7, purl 7, knit 7, knit 1, purl 1, knit 1, purl 1.

    Repeat rows 5 through 12 twice more.

    Row 29: *(knit 1, purl 1) – repeat from * to last stitch, knit 1 end.

    Row 30: *(purl 1, knit 1) – repeat from * to last stitch, purl 1 end.

    Row 31: *(knit 1, purl 1) – repeat from * to last stitch, knit 1 end.

    Row 32: *(purl 1, knit 1) – repeat from * to last stitch, purl 1 end.

    Cast off.

  5. The Square Collection – Diagonal Bobble Stitch.

     diagonal bobble

    This is part of our monthly Blanket Club.  Patterns are released every month on the website – then published in a booklet after a year.

    The squares worked in DK measure about 4 ½” square – and the larger ones 8” square.  You could use 3 strands of DK together – working on 8mm knitting needles – and the square will be bigger.


    You will need;

    1 strand of double knitting to be worked on 4mm knitting needles – about 12g

    Or 2 strands of double knitting (equal to chunky weight yarn) to be worked on 6mm knitting needles – about 20g

     If you are using the double knitting weight of yarn, then use 2 strands together throughout.

    • If you are using the chunky weight of yarn, then use 1 strand throughout.
    • Remember to count all the rows as you work up the square.

    The technique you need to make the bobble is as follows – [knit 1, purl 1, knit 1, purl 1, knit 1, purl 1] all into one stitch.  Then slip the second stitch in over the last stitch – slip the next in line over the last stitch – then the next in line over, and again until you are back to just the 1 stitch.  Do this every place the pattern says ‘make bobble’.

    TIP – if you get lose your place ( it’s easy to gain a stitch if you don’t take enough of the bobble loops back over) – remember to create each bobble AFTER the column that the previous one is in – making it go in a diagonal slant.

    Cast on 28 stitches.

    Row 1: *(knit 1, purl 1) – repeat from * to end.

    Work row 1: 3 more times more.

    Row 5: knit 1, purl 1, knit 1, purl 1, knit 1 *knit 2, make bobble, purl 3 – repeat from * to last 5 stitches, purl 1, knit 1, purl 1, knit 1, purl 1.

    Row 6:  knit 1, purl 1, knit 1, purl 1, then work each stitch the way it lies – purl into a purl – knit into a knit, (the bobble is a knit stitch) to last 4 stitches, knit 1, purl 1, knit 1, purl 1.

    Row 7: knit 1, purl 1, knit 1, purl 1, knit 1, purl 1, *knit 2, make bobble, purl 3– repeat from * to last 4 stitches, knit 1, purl 1, knit 1, purl 1.

    Row 8: knit 1, purl 1, knit 1, purl 1, work each stitch the way it lies – purl into a purl – knit into a knit, to last 4 stitches, knit 1, purl 1, knit 1, purl 1.

    Row 9: knit 1, purl 1, knit 1, purl 1, knit 1, purl 2, *knit 2, make bobble, purl 3, repeat from * to last 9, knit 2, make bobble, purl 2, knit 1, purl 1, knit 1, purl 1.

    Row 10: knit 1, purl 1, knit 1, purl 1, work each stitch the way it lies – purl into a purl – knit into a knit, to last 4 stitches, knit 1, purl 1, knit 1, purl 1.

    Row 11: knit 1, purl 1, knit 1, purl 1, knit 1, purl 3, *knit 2, make bobble, purl 3, repeat from * to last 8 stitches, knit 2, make bobble, purl 1, knit 1, purl 1, knit 1, purl 1.

    Row 12: knit 1, purl 1, knit 1, purl 1, work each stitch the way it lies – purl into a purl – knit into a knit, to last 4 stitches, knit 1, purl 1, knit 1, purl 1.

    Row 13: knit 1, purl 1, knit 1, purl 1, knit 1, make bobble, purl 3, *knit 2, make bobble, purl 3, repeat from * to last 7, knit 2, make bobble, knit 1, purl 1, knit 1, purl 1.

    Row 14: knit 1, purl 1, knit 1, purl 1, work each stitch the way it lies – purl into a purl – knit into a knit, to last 4 stitches, knit 1, purl 1, knit 1, purl 1.

    Row 15: knit 1, purl 1, knit 1, purl 1, knit 2, make bobble, purl 3, *knit 2, make bobble, purl 3, repeat from * to last 6, knit 1, purl 1 knit 1, purl 1, knit 1, purl 1.

    Row 16: knit 1, purl 1, knit 1, purl 1, work each stitch the way it lies – purl into a purl – knit into a knit, to last 4 stitches, knit 1, purl 1, knit 1, purl 1.


    This is the pattern layout.  Repeat rows 5 – 16 once more.


    Row 29: *(knit 1, purl 1) – repeat from * end.

    Repeat last row 3 times more.

    Cast off.


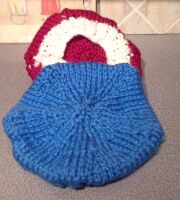
  6. 20141024_084829 (1)

    You will need:

    9mm knitting needles

    1 ball of super chunky yarn

    Large blunt needle to sew up


    You may find helpful: a row counter


    Method
    With 9mm knitting needles and super chunky thickness yarns cast on 40 stitches.

    Work the rib.

    Row 1: *(knit 1, purl 1) – repeat from * to end of row.

    Work row 1: 4 more times.

    Row 6: increase row – *(purl 3, purl into the front and then the back of the next stitch) – repeat from * to end of row.  (50 stitches).


    To work the ‘up 1’ stitch increase.

     Work to the place where the increase is to be made. Insert the left needle from front to back into the horizontal strand between the two stitches: knit into the loop created


    Work the increase shape.

    Row 7: *(knit 1, up1, knit 8, up 1, knit 1) work 5 times.  (60 stitches).

    Row 8: purl across all stitches.

    Row 9: *(knit 1,. up1, knit 10, up 1, knit 1) work 5 times.  (70 stitches).

    Row 10: purl across all stitches.

    Row 11: *(knit 1, up1, knit 12, up 1, knit 1) work 5 times.  (80 stitches).

    Row 12: purl across all stitches.

    Work the decrease shaping.

    Row 13: *(knit 1, knit the next 2 stitches together, knit 10, knit the next 2 stitches together, knit 1) work 5 times.  (70 stitches).

    Row 14: purl across all stitches.

    Row 15: *(knit 1, knit the next 2 stitches together, knit 8, knit the next 2 stitches together, knit 1) work 5 times.  (60 stitches).

    Row 16: purl across all stitches.

    Row 17: *(knit 1, knit the next 2 stitches together, knit 6, knit the next 2 stitches together, knit 1) work 5 times.  (50 stitches).

    Row 18: purl across all stitches.

    Row 19: *(knit 1, knit the next 2 stitches together, knit 4, knit the next 2 stitches together, knit 1) work 5 times.  (40 stitches).

    Row 20: purl across all stitches.

    Row 21: knit 1, *(knit the next 2 stitches together, knit 2) repeat to last 3 stitches, knit the next 2 stitches together, knit 1.  (30 stitches).

    Row 22: purl across all stitches.

    Row 23: *(knit 1, knit the next 2 stitches together, knit the next 2 stitches together, knit 1) work 5 times.  (20 stitches).

    Row 24: purl 2 stitches together across all stitches. (10 stitches).

    Row 26: knit 2 stitches together across all stitches.  (5 stitches).

    Cut yarn leaving about 8” tail, thread the yarn through the remaining stitches, pull tight and secure.  Use the tail to sew up.


    Take a step further:

    • Experiment with different colour yarn stripes.
    • Add a knitted or crochet flower to the brim.


    This pattern is part of The Kitten and The Goat Monthly Virtual Knitting Circle.  Sign up to our email list on the website to get a newsletter with a free pattern and access to 2 videos every month.


    The Kitten and The Goat

    9, New Shambles, Kendal, LA9 4TS

    www.thekittenandthegoat.co.uk

    Facebook – Instagram – Pinterest – search for The Kitten and The Goat


  7. Princess Crown


    You will need:

    DK yarn in a pretty colour

    Scraps of DK yarn to make bobbles

    Large blunt needle to sew up


    You may useful:
    Row counter

    Beads / buttons / sequins to decorate if you wish

    Size: this measures 17” when finished.  If you want a longer crown you can lengthen by knitting an extra plain strip to join in the back – of adding a piece of elastic.


    Note: this is worked from the top down.  You decrease from the points and add the bobbles as you go.  If you don’t want to add the bobbles – just miss them out.


    MB: Make Bobble. Transfer last worked stitch back to working needle. knit, yarn over, knit, yarn over, knit into the same stitch. Turn, purl those 5 stitches, turn again, knit 2 together, k1, k 2 together. Slip second stitch over, then third stitch. If you want, you could also knit the bobble part in a contrasting colour for "gems" at the points of the crown.

    For Bobbles in contrasting colour: switch to new colour after working decrease stitches, work the same way – but in the new colour, switch back to the main colour after bobble, continue in pattern with MC until next bobble.  Tie the tails of the bobble to secure and sew in under the bobble.


    Method:

    Cast on 140 stitches.

    Knit 4 rows.

    Row 1: * knit 9, slip 2 stitches from one needle to the other as if you were going to knit 2 together – knit the next stitch – pass the slipped stitches over the knit, knit 8 – repeat from * to end of row.  126.

    Row 2: *purl 7, slip 2 stitches from one needle to the other as if you were going to knit 2 together – knit the next stitch – pass the slipped stitches over the knit, make bobble, purl 8 – repeat from * to end of row.  112.

    Row 3: *knit 7, slip 2 stitches from one needle to the other as if you were going to knit 2 together – knit the next stitch – pass the slipped stitches over the knit, knit 6. 98.

    Row 4: purl all stitches.

    Row 5: knit all stitches.

    Row 6: purl all stitches.

    Row 7: knit 6, *purl 3, knit 3, knit 2 together, bring yarn to the front, knit 1, bring yarn to the front, knit 2 together, knit 3 – repeat from * last 8 stitches – purl 3, knit 5.

    Row 8: purl all stitches.

    Row 9: knit 6, *purl 3, knit 2, knit 2 together, bring yarn to the front, knit 3 (or knit 1, make bobble, knit 1), bring yarn to the front, knit 2 together, knit 2 – repeat from * last 8 stitches – purl 3, knit 5.

    Row 10: purl all stitches.

    Row 11: knit 6, *purl 3, knit 3, knit 2 together, bring yarn to the front, knit 1, bring yarn to the front, knit 2 together, knit 3 – repeat from * last 8 stitches – purl 3, knit 5.

    Row 12: purl all stitches.

    Row 13: knit all stitches.

    Work the cuff:

    Switch back to Garter Stitch (knit) for final 4 rows.

    Cast off all stitches loosely, Join back seam, weave in ends.


    Take one step further –

    -       Decorate with beads / buttons / sequins if you wish.

    -       Work a bobble in the centre space of the lace – or add a button / bead.

    -       Add a ribbon through the lace.

    -       If you want a deeper crown – repeat rows 7 through 12 as needed.

    -       Work the cuff in a fluffy or contrast yarn.

    -       Don’t work the bobbles – work them all in one colour – work them all in different colours.

    -       Add a wide piece of elastic and wear headband style.

  8. the kitten and the goat - knitting with kitten blanket club - long cros sti     Long Cross Stitch Square

    You will need;

    1 strand of double knitting to be worked on 4mm knitting needles – about 12g

    Or 2 strands of double knitting (equal to chunky weight yarn) to be worked on 6mm knitting needles – about 20g


    • If you are using the double knitting weight of yarn, then use 2 strands together throughout.
    • If you are using the chunky weight of yarn, then use 1 strand throughout.
    • Remember to count all the rows as you work up the square.


    Cast on 29 stitches.

    Row 1: *(knit 1, purl 1) –  repeat from * to last stitch, knit 1.

    Row 1: *(purl 1, knit 1) –  repeat from * to last stitch, purl 1.

    Work row 1: and row 2: again


    The pattern:

    Row 5: knit 1, purl 1, knit 1, purl 1, knit to last 4 stitches, purl 1, knit 1, purl 1, knit 1.

    Row 6: purl 1, knit 1, purl 1, knit 1, purl 3, purl 6 wrapping the yarn twice round the needle for each stitch, knit 3, purl 6 wrapping the yarn round the needle twice, purl 3, knit 1, purl 1, knit 1, purl 1.

    Row 7: knit 1, purl 1, knit 1, purl 1,  knit 3, slip the 6 purled stitches onto the right hand needle dropping the extra wrap, put these same stitches back onto the left hand needle and lift the last 3 stitches over the top of the first 3 stitches to cross them over – keep them in the crossed over order on the needle and knit these 6 stitches, knit 3, slip the 6 purled stitches onto the right hand needle dropping the extra wrap, put these same stitches back onto the left hand needle and lift the last 3 stitches over the top of the first 3 stitches to cross them over – keep them in the crossed over order on the needle and knit these 6 stitches, knit 3, purl 1, knit 1, purl 1, knit 1.

    Row 8: purl 1, knit 1, purl 1, knit 1, purl to last 4 stitches, knit 1, purl 1, knit 1, purl 1.


    These last 4 rows make up the pattern – work them a total of 6 times

    Row 28: *(knit 1, purl 1) – repeat from * to last stitch, knit 1.

    Row 29: *(purl 1, knit 1) – repeat from * to last stitch, purl 1.

    Row 30: *(knit 1, purl 1) – repeat from * to last stitch, knit 1.

    Row 31: *(purl 1, knit 1) – repeat from * to last stitch, purl 1.

    Cast off.


  9. jam tart pin cushionYou will need

    A pair of 4mm knitting needles

    Double knitting yarn in a ‘pastry’ colour

    Double knitting yarn in a ‘jam’ colour
    Large blunt needle to sew up
    Wadding to fill

    Needle and thread to sew the case to the jam

     To make

    Cast on 5

    Row 1: Purl across all stitches.

    Row 2: knit 1, knit into the front and the back of the rest of the stitches.  (9 stitches).

    Row 3: Purl across all stitches.

    Row 4: knit into the front and then into the back of the first stitch, knit to last stitch, knit into the front and then into the back of the last stitch.  (11 stitches).

    Row 5:  Purl across all stitches.

    Row 6: knit into the front and then into the back of the first stitch, knit to last stitch, knit into the front and then into the back of the last stitch.  (13 stitches).

    Row 7: Purl across all stitches.

    Row 8: knit into the front and then into the back of the first stitch, knit to last stitch, knit into the front and then into the back of the last stitch.  (15 stitches).

    Row 9: Purl across all stitches.

    Row 10:  knit across all stitches.

    Row 11: Purl across all stitches.

    Row 12: knit across all stitches.

    Row 13: Purl across all stitches.

    Row 14: knit first 2 stitches together, knit to last 2 stitches, knit last 2 stitches together. (13 stitches).

    Row 15: Purl across all stitches.

    Row 16: knit first 2 stitches together, knit to last 2 stitches, knit last 2 stitches together. (11 stitches).

    Row 17: Purl across all stitches.

    Row 18: knit first 2 stitches together, knit to last 2 stitches, knit last 2 stitches together. (9 stitches).

    Row 19: Purl across all stitches.

    Row 20: knit first 2 stitches together, knit to last 2 stitches, knit last 2 stitches together. (7 stitches).

    Cast off using purl stitches.

    Leave a long tail to sew up later.

    The Pastry case – make 1.

    Cast on 3 stitches.

    Row 1: knit into the front and then into the back of every stitch.  (6 stitches).

    Row 2: knit into the front and then into the back of every stitch.  (12 stitches).

    Row 3: (knit 1, knit into the front and then into the back of next stitch) – repeat to end.  (18 stitches).

    Row 4: (knit 2, knit into the front and then into the back of next stitch) – repeat to end.  (24 stitches).

    Row 5: (knit 3, knit into the front and then into the back of next stitch) – repeat to end.  (30 stitches).

    Row 6: (knit 4, knit into the front and then into the back of next stitch) – repeat to end.  (36 stitches).

    Row 7: (knit 5, knit into the front and then into the back of next stitch) – repeat to end.  (42 stitches).

    Row 8: knit across all stitches.

    Row 9: purl across all stitches.

    Row 10: knit across all stitches.

    Row 11: purl across all stitches.

    Row 12: (knit 1, bring yarn under the needle to the front of the work so that the yarn loops over the top of the needle, knit the next 2 stitches together) – repeat to end.  The yarn over the needle replaces the stitch you have lost by knitting 2 together – so you should still have 42 stitches on the needle.

    Row 13: purl across all stitches.

    Row 14: knit across all stitches.

    Row 15: purl across all stitches.

    Row 16: knit across all stitches.

    Cast off using the purl stitch.

    To make up

    Jam - Take the long tail of the jam and make running stitches all around the very edge of the knitting.  Put the wadding on the wrong side and pull up the tail so that the top gathers round the wadding and makes the round jam shape.

    Case - Fold down the top of the pastry case to make the ’bumps’ stand proud and run a loose long running stitch around to secure the cast-off edge to the base. 

    Sit the jam into the middle of the case and pull up all around the edge around the jam.  Use the thread and sharp needle – work from the outside –   and catch the layers together all the way round.  Work round the tart several times to make sure the jam is securely held in place.

     This pattern is part of The Kitten and The Goat Monthly Virtual Knitting Circle.  Sign up to our email list on the website to get a newsletter with a free pattern and access to 2 videos every month.

    The Kitten and The Goat

    9, New Shambles, Kendal, LA9 4TS

    www.thekittenandthegoat.co.uk

    Facebook – Instagram – Pinterest – search for The Kitten and The Goat


  10. blanket club - ladder stitchYou will need;

    1 strand of double knitting to be worked on 4mm knitting needles – about 12g

    Or 2 strands of double knitting (equal to chunky weight yarn) to be worked on 6mm knitting needles – about 20g

    • If you are using the double knitting weight of yarn, then use 2 strands together throughout.
    • If you are using the chunky weight of yarn, then use 1 strand throughout.
    • Remember to count all the rows as you work up the square.

    1 Technique is used in this pattern – knit 1 below.  Put the point of the needle into the loop of the stitch below the next one – knit into it – drop both loops.

    Cast on 29 stitches.

    Row 1: *(knit 1, purl 1) – repeat from * to last stitch, knit 1.

    Row 2: *(purl 1, knit 1) – repeat from * to last stitch, purl 1.

    Row 3: *(knit 1, purl 1) – repeat from * to last stitch, knit 1.

    Row 4: *(purl 1, knit 1) – repeat from * to last stitch, purl 1.

    Row 5: knit 1, purl 1, knit 1, purl 1, *k1, purl 3, repeat from * to last 5 stitches, knit 1, purl 1, knit 1, purl 1, knit 1.

    Row 6: purl 1, knit 1, purl 1, knit to last 3 stitches, purl 1, knit 1, purl 1.

    Row 7: knit 1, purl 1, knit 1, purl 1, *knit 1 into the loop below, purl 3– repeat from * to last 4 stitches, knit 1 into the loop below, purl 1, knit 1, purl 1, knit 1.

    Row 8: purl 1, knit 1, purl 1, knit to last 3 stitches, purl 1, knit 1, purl 1.

    Row 9: knit 1, purl 1, knit 1, purl 1, *knit 1 into the loop below, bring the yarn to the front of the work, slip 3 purl wise, take the yarn to the back of the work, knit 1 into the loop below – repeat from * to last 4 stitches, knit 1 into the loop below, purl 1, knit 1, purl 1, knit 1. (Do not pull the yarn loops at the front of the work too tight – aim for the work to sit flat with the loop running round the stitches).

    Row 10: purl 1, knit 1, purl 1, knit to last 3 stitches, purl 1, knit 1, purl 1.

    Rows 7: - 8: - 9: - 10: form the pattern.  Repeat just these rows until you have completed row 28:

    Row 29: *(knit 1, purl 1) – repeat from * to last stitch, knit 1.

    Row 30: *(purl 1, knit 1) – repeat from * to last stitch, purl 1.

    Row 31: *(knit 1, purl 1) – repeat from * to last stitch, knit 1.

    Row 32: *(purl 1, knit 1) – repeat from * to last stitch, purl 1.

    Cast off.

  11. This pattern is part of the Knitting with Kitten Knitting Circle

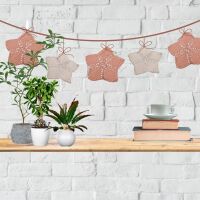
    star bunting on shelf

    Summer Picnic Bunting Knitting Kit 

    You will need:-

    Scraps of double knitting yarns

    4mm knitting needles

    Ribbon or string to hang

    Needle to sew in the tails


    You may find helpful – a row counter – beads / sequins to decorate if you wish


    For each star:-

    Cast on 5 stitches.

    Row 1: (Knit 1 but don’t slip the loop off the needle, bring the yarn forward, then knit again into the same stitch, then slip the original loop off) into each stitch.  Work the stitches loosely.  15 stitches.

    Row 2: knit.

    Row 3: (knit 1, yarn forward, knit 1, yarn forward, knit 1) 5 times.  25 stitches.

    Row 4: Knit.

    Row 5: (Knit 1, yarn forward, knit 3, yarn forward, knit 1) 5 times.  35 stitches.

    Row 6: Knit.

    Row 7: (k1, yarn forward, k5, yarn forward, k1) 5 times – 45 stitches.

    Row 8: Knit.

    Row 9: (k1, yarn forward, k7, yarn forward, k1) 5 times – 55 stitches.

    Row 10: Knit

    Row 11: (k1, yarn forward, k9, yarn forward, k1) 5 times – 65 stitches.

    Row 12: Knit

    Row 13: (k1, yarn forward, k11, yarn forward, k1) 5 times – 75 stitches.

    Row 14: Knit.


    Shape points

    Knit 15 – turn and work on these stitches alone.

    Row 1: knit 1, knit 2 together, knit to last stitches. 3 k2tog, k1.

    Row 2: Knit.

    Repeat these 2 rows until 5 stitches remain.

    Next row. Knit.

    Finish – knit 2 together, knit 1, knit 2 stitches together. 

    Next row: Knit 3.

    End - Knit 3 together.  Finish off.

    Work other points the same way.

    Make as many as you want.

    Take a step further:-

    • Add across a ribbon as a banner.
    • Add down a ribbon as a hanger.
    • Add 3 to different lengths as a hanger.
    • Decorate with beads / sequins etc.
    • Make in chunky yarn (on 6mm needles) as a place mat.
    • Make in super chunky yarn (on 9mm needles) as a table mat.
    • Perfect for a baby’s room.
    • Red, white and blue looks amazing as a seaside theme.
    • Work in seasonal colours for Autumn and Christmas.
    • Hang from the top central point – or link the arms.
    • And I am going to say it – add a little face to the top point for starfish.
  12. IMG_20230531_134250_890

    You will need

    1 x 4.5 or 5mm knitting needle

    1 x 8mm or 9mm knitting needle

    Double Knitting yarn – 2 100g balls of James Brett Shh – if you use another brand, you will probably need more as you will get so much less on the ball.

    You may find helpful: a row counter – a tape measure

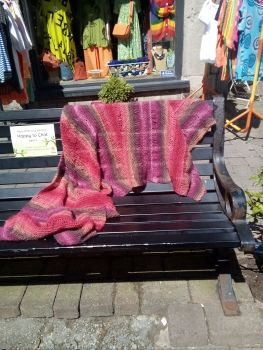
    This pattern is so versatile you can literally make it in any number of stitches across – any length you fancy.  I worked it on uneven needles to get a more open lace look, but you could work it on a pair of 6mm needles and get the same the pattern – just closer together.


    My shawl measures 28”  wide x 82” long

    And took a whole ball and about ¼ of another – but I should have gone longer!


    Method:

    Using the 4.5mm needle – cast on 85 stitches onto the 9mm needle.

    Row 1: using the 4.5mm needle knit all stitches across row.

    Row 2: using the 9mm needle knit all stitches across row.

    Repeat rows 1: and 2: until you reach -

    Row 14: with the 9mm needle – knit 1 *(bring the yarn under the needle, then over the top and, knit the next stitch (creates an extra stitch) – repeat from * to end of row.

    Row 15: with the 4.5mm needle knit the first stitch, *(push the created loop from the previous row off the needle, knit the next stitch – repeat from * to end of row.

    Row 16: using the 9mm needle knit all stitches across row.


    These 16 rows form the pattern, work as much as you like and cast off very loosely.


    Take one step further –

    -       Add a fringe.

    -       For a narrower scarf cast on less stitches.

    -       Change the number of rows between stripes.

  13. IMG_0553

    Approximate size – 17cm high – 22cm across

    This pattern is worked all in plain knit stitch with contrast stripes.  The ‘bump’ shapes are formed by the yarn pulled across the back of the stripes.


    You will need: -

    4mm knitting needles

    Double Knitting yarn in 2 colours – about 30 gms of each colour

    Large blunt needle to sew up

    Large, bright statement button or a pompom for the top of the cosy.


    Method - Sides – make 2

    Cast on 84 stitches in colour A

    Row 1: knit across all stitches.

    Row 2- row 4: repeat row 1


    Working the colour stripes.

    Row 1: knit 2 stitches in yarn A, twist yarns around each other, *(knit 8 stitches in yarn B, twist yarns around each other, pull across yarn A, knit 8 stitches in Yarn A, twist yarns around each other, pull across yarn B) repeat from * to last 2 stitches, knit 2 stitches in yarn B.


    *NB – you don’t need to pull the yarn really tightly across the gaps – just enough to create the shape.


    Row 2: knit 2 stitches in yarn B,

    bring yarn B to front of work, twist yarns around each other, take yarn A to back of work, *(knit 8 stitches in yarn A, bring yarn A to front of work, twist yarns around each other, take yarn B to back of work, and pull up slack, knit 8 stitches in yarn B, bring yarn B to back of work, twist yarns around each other, take yarn A to the front of the work, and pull up slack).

    repeat from * to last 2 stitches, knit 2 stitches in yarn A.


    These 2 rows form the pattern – repeat them until work measures 13cm (you can make it longer here if you wish) from cast on edge.


    The back of the work will look like this.


    Shape top.

    Keep the yarns working in the stripe pattern as before.

    Row 1: (decrease row) knit 2 stitches in A, then in each of the colour stripes work the following set of stitches.  (knit 2 together, knit 4, knit 2 together), to the last 2 stitches, knit 2 stitches in yarn B. (64 stitches).


    Row 2: (plain row) knit 2 stitches in yarn B, then in each of the colour stripes work, (knit 6 stitches), to last 2 stitches, knit 2 stitches in yarn A.


    Row 3: (decrease row) knit 2 stitches in A, then in each of the colour stripes work the following set of stitches, (knit 2 together, knit 2, knit 2 together), to the last 2 stitches, knit 2 stitches in yarn B. (34 stitches).


    Row 4: (plain row) knit 2 stitches in yarn B, then in each of the colour stripes work, (knit 4 stitches), to last 2 stitches, knit 2 stitches in yarn A.  Break off yarn B.


    Row 5: Continue in yarn A only.  Knit 2 stitches together all across row. (17 stitches).

    Row 6: purl all across row

    Row 7: Continue in yarn A only.  Knit 2 stitches together across row to last stitch, knit 1. (9 stitches).

    Draw yarn through stitches, pull tight and secure.


    Making up

    Sew the 2 sides together from the front side.  Use a mattress stitch to join the 2 colour ‘bumps’ together at the base – hiding the securing columns at the very edge.


    Sew up about 1” up from cast on edge.  Leave a gap for the handle and spout and sew up to the top of the cosy.  Add a bright statement button or a pompom to the top of the cosy.


    For the smaller size teapot – 11cm high x 15cm wide

    You will need about 12 grams of each colour.

    Cast on 52 stitches.

    Work 5 rows in plain knitting.

    Work rows 1 and 2 of the pattern as before until work measures about 10 cm.

    Decrease for the top shaping as before.


    Take a step further:

    • This looks just as cool in all one colour.
    • You can adjust the size by adding more (or less) columns of colour.
    • You can also make the columns 6 stitches wide instead of 8.
    • Knit in stocking stitch by working 1 knit row – then 1 purl row – making sure that you adjust the yarn to keep all the threads to the back.
    • Try working a basket weave pattern by working blocks of stocking stitch and reverse stocking stitch – changing them round every 8 or 10 rows.
  14. Untitled design (1)

    This pattern is part of the Knitting with Kitten Knitting Circle

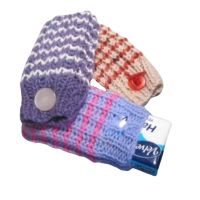
    A-Tishoo! A-Tishoo! Tissue Pocket Knitting Kit

     Approximate size – made to fit one of these small pocket size tissues packs.

    This pattern is worked in Fisherman’s rib.

    You will need: -

    6mm knitting needles

    Chunky yarn in main colour – about 12 gm

    Small amount of Chunky for the contrast - about 8 gm

    Large blunt needle to sew up

    Button to fasten


    • If you don’t have any chunky - use 2 strands of DK (which is equal to chunky weight) worked together.


    Method:  With 6mm knitting needles and main colour, cast on 26 stitches.

    Row 1: knit 1, purl 1 – repeat to end of row.

    Repeat row 1: 3 more times.

    Row 5: knit 1, purl 1 for 6 stitches, slip 1 stitch, knit 2 stitches together, pick up the slipped stitch and bring it over your 2 stitches knitted together and off the needle, then purl 1, knit 1 to end of row.

    Row 6: knit 1, purl 1 for 18 stitches, yarn is at the front of the needle – wrap the yarn around the needle (anti-clockwise) once – then knit 1, purl 1 to end of row.

    Row 7: knit 1, purl 1 – repeat to end of row.  Work into the back of the loose loops carefully so that you don’t lose them – and when you get to the end of the row check that you have 26 stitches.

    Row 8: knit 1, purl 1 – repeat to end of row.

    Row 9: knit 1, purl 1 – repeat to end of row.

    Row 10: knit 1, purl 1 – repeat to end of row.

    Change to the pattern

    Each time you work the knit stitch – put the point of the needle into the body of the stitch just UNDER the one on the needle – and work a knit stitch in the normal way – dropping both loops off the needle to complete the stitch.


    This pattern consists of 2 rows in the main colour and 2 rows in the contrast colour – do not break the yarn in between the colour changes – just bring it up to the next start.

    Row 1: knit one in stitch below, purl 1 as normal – repeat to end of row.

    Row 2: knit 1 below, purl 1 – repeat to end of row. Do not break yarn

    Row 3: Change colour – using the contrast colour - knit 1 below, purl 1 – repeat to end of row.

    Row 4: using the contrast colour knit 1 below, purl 1 – repeat to end of row.  Do not break yarn.

    Repeat these 4 pattern rows until you have worked about 6” from the cast on edge.

    Cast off.


    Take a step further -

    -       Cast on more stitches (keep an even number for the pattern to work) – line with fabric to make a phone / I Pad / kindle holder.

    -       Work more pattern sets to make longer – line with fabric to make a matching glasses case.

    -       Add a long ‘I’ cord / ribbon / platted yarn to make a shoulder purse.

    -       Work a 4 rows to each pattern for thicker stripes.

    -       Great little fund raiser for school / church fates.

    -       Go as wild as you like with colours.


    This pattern is part of The Kitten and The Goat Monthly Virtual Knitting Circle.  Sign up to our email list on the website to get a newsletter with a free pattern and access to 2 videos every month.


    The Kitten and The Goat

    9, New Shambles, Kendal, LA9 4TS

    www.thekittenandthegoat.co.uk

    Facebook – Instagram – Pinterest – search for The Kitten and The Goat

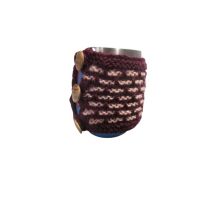
  15. Ribbon Stitch Mug Cosy

    Untitled design

    You will need:

    4mm knitting needles

    Small amounts of DK yarn in 2 colours

    Button

    Needle to sew button on


    You may useful: row counter – tape measure


    Makes a band 9” long

    Method:

    Before you start – wind off a small amount of the background colour into a smaller ball (only a couple of yards) – this will form the solid border up the far side of the cosy without having to cut and rejoin the main yarn.


    Cast on 52 stitches using the background colour

    Knit 4 rows.

    Start the pattern rows


    Row 1: with background colour – knit across all stitches.

    Row 2: with background colour – purl across all stitches.


    Row 3: with background colour – knit 4 stitches, drop yarn, with ribbon colour – * knit 3, without moving your yarn - slip 1 stitch onto the right-hand needle purl wise – but don’t work it, repeat from * to last 4 stitches, drop yarn - with the small ball of background colour, knit 4.  Look back along your needle – you should have 1 background loop between every 3 ribbon colour loops with the background colour at the sides.

    Tip – when you swop yarns from now on – twist them round each other to prevent a gap in the work.


    Row 4: with small ball of background colour – purl 4 stitches, drop yarn, with ribbon colour – *bring the yarn to the front of the work, slip 1 stitch onto the right-hand needle purl wise – but don’t work it, take yarn to the back of the work, knit 3 - repeat from * to last 4 stitches – bring yarn to front, drop yarn - with the main ball of background colour, purl 4.


    Row 5: with background colour – knit across all stitches.

    Row 6: with background colour – purl across all stitches.


    Row 7: with background colour – knit 2, drop yarn, bring up ribbon colour – with ribbon colour - knit 3, *slip 1 stitch onto the right-hand needle purl wise – but don’t work it, knit 3 stitches – repeat from * to last 3 stitches, drop ribbon colour – bring up background colour from small ball of background colour – knit 3.  Look back along your needle – you should have 1 background loop between every 3 ribbon colour loops with the background colour at the sides.


    Row 8: with background colour – purl 3, drop yarn – with ribbon colour – * knit 3, bring the yarn to the front of the work, slip 1 stitch onto the right-hand needle purl wise – but don’t work it, take yarn to the back of the work, – repeat from * to last 5 stitches – knit 3, drop ribbon colour – bring up background colour – purl 2.


    These 8 rows form the complete pattern – work as many pattern rows to make the depth you want.


    Add the other border.

    Knit 1 row.

    Purl 1 row.

    Purl 4 rows.

    Cast off purl wise.


    Making up:

    Sew buttons at the corners on one edge.  You can add 2 or 3 buttons – depends on what your cup is like.  On the other side create button loops to fasten.  You can do this by adding a couple of strands of yarn and blanket stitching along them – adding a loop of elastic – or adding a couple of those small elastic hair ties (very useful for making button loops!)


    Take one step further –

    -       Work deeper for coffee pots.

    -       You could just repeat the first 4 rows instead of working the 8 – this will give you more of a grid like pattern as opposed to a brick pattern.

    -       Cast on more or less stitches to make longer of shorter.  The pattern consists of blocks of 4 stitches for the centre + 4 stitches either side for the border.


    This pattern is part of The Kitten and The Goat Monthly Virtual Knitting Circle.  Sign up to our email list on the website to get a newsletter with a free pattern and access to 2 videos every month.


    The Kitten and The Goat

    9, New Shambles, Kendal, LA9 4TS

    www.thekittenandthegoat.co.uk

    Facebook – Instagram – Pinterest – search for The Kitten and The Goat


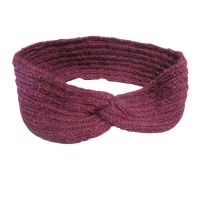
  16. knitting with kitten - the kitten and the goat - twisted headband

    You will need

    dk yarn

    4mm knitting needles

    Large blunt needle

    Tape measure

    Size

    Head circumference: about 22″ – If you want to change the length of the headband knit fewer/ more rows.

    Width:  3″


    With 4mm knitting needles cast on 30 stitches loosely.


    Start straight into the rib pattern

    Row 1: knit 2, *(purl 2, knit 2) – repeat from * to end of row.

    Row 2: purl 2, *(knit 2, purl 2) – repeat from * to end of row.

    Repeat these 2 rows until work measures 23”


    Cast off leaving a long tail


    Make the centre detail:


    Fold the band in half across the short way - bring the edges close together – slide one edge over a little so that the edge of one side is in the centre of the other.


    Make a “sandwich” – so that one edge wraps around the other – line it up snugly.  Now you have 4 layers that need to be stitched through. With the tail you left after casting off sew the edges together. The seam itself will be hidden inside the twist.


    If you want a narrower headband – cast on 22 stitches

    If you want a wider headband – cast on 42 stitches.

    Take a step further:

    • Work in a striped pattern – you can work any amount of striped rows – either even counts or all different thicknesses.
    • Change colour half way through.
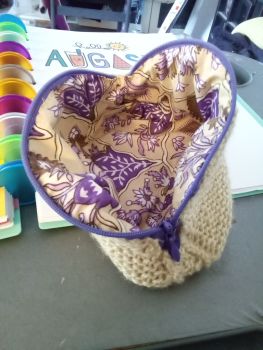
  17. knitting with kitten purse 01        knitting with kitten purse 04


    Approximate size – 16cm x 12cm

    You will need:

    DK yarn

    4 mm needles

    Large blunt needle to sew up

    1 x fat quarter to line

    Short zip

    Sharp needle to sew lining and zip

    Matching thread


    SIDES – make 2 the same

    Using DK yarn and 4mm needles – cast on 26 stitches.

    Row 1: knit across all stitches.

    Row 2: increase - knit 6, pick up the yarn loop in front of the next stitch and knit into it, knit to last 6 stitches, pick up the yarn loop in front of the next stitch and knit into it, knit 6.  (28 stitches).

    Row 3: knit across all stitches.

    Row 4: increase row - knit 6, pick up the yarn loop in front of the next stitch and knit into it, knit to last 6 stitches, pick up the yarn loop in front of the next stitch and knit into it, knit 6. (30 stitches).

    Row 5: knit across all stitches.

    Work rows 30 rows in plain knitting


    Decrease - knit 1, knit 2 together, knit to last 3, knit 2 together, knit 1.  (28 stitches).

    Knit 1 row.

    Decrease - knit 1, knit 2 together, knit to last 3, knit 2 together, knit 1.  (26 stitches).

    Knit 1 row.

    Decrease - knit 1, knit 2 together, knit to last 3, knit 2 together, knit 1.  (24 stitches).

    Knit 1 row.

    Decrease - knit 1, knit 2 together, knit to last 3, knit 2 together, knit 1.  (22 stitches).

    Knit 1 row.

    Decrease - knit 1, knit 2 together, knit to last 3, knit 2 together, knit 1.  (20 stitches).

    Knit 1 row.


    EDGINGS

    Take one of the front panels - with the right side of the work facing you, and using dk yarn –– start at the point of the top cast off shaping – working towards the bottom edge – push your knitting needle through the first of the row end bumps, wrap the yarn round the needle and pull it through to create a stitch. Work your way along the side of the panel, pick up and knit into the bumps until you have 14 stitches evenly spaced across the edge.

    Row 1: knit across all stitches.

    Row 2: knit across all stitches.

    Cast off knit wise.

    For the base – with the right side facing - start at the right hand corner – pick up 22 stitches along the bottom edge.

    Pick up 14 stitches along the other side of the purse as before.

    Note: you will have a right angle shape gap at the bottom corners – that’s fine!


    TO MAKE UP

    Join the cut out corner shape first – fold each corner onto itself to form a little box / pleat shape.

    With the edges together, use a mattress type stitch to join just the edging strips.


    Fabric lining – Once the body of the purse is sewn together you will know the size and shape of your lining.  Fold the fabric in half and measure the shape to cut.  You can either draw the shape on a piece of paper first – or work directly on the fabric.  When you cut your fabric – keep the fold at the bottom edge of the lining - add an extra 1cm at the sides for the seams.  With right sides of the fabric together – sew up the sides.


    Zip – the zip sits in between the top shaping of the purse – the teeth of the zip sit centrally to the side edgings.  Put the zip right side up flat under the edge of the knitting (you don’t turn the edge of knitting).  Sew along the edge with tiny running stitches using a sharp needle and thread.  Insert the lining into the purse.  Turn the raw edge of the fabric under and hem the folded edge to the back of the zip.


    -       Work in chunky weight on 6mm for a matching make up / pencil case.

    -       Work in super chunky on 9mm – don’t add the zip – put handles on and make a handy little tote bag.

    -       if you leave long tails of yarn when you cast on and cast off yarn on the edgings - you can use these to sew the bag together.

    -       You can make the lining out of any cotton / poly cotton fabric – up-cycle an old shirt.

    -       Mess about with stripes or do each section in a different colour.

    -       Add a motif to the front.


    This pattern is part of The Kitten and The Goat Monthly Virtual Knitting Circle.  Sign up to our email list on the website to get a newsletter with a free pattern and access to 2 videos every month.


    The Kitten and The Goat

    9, New Shambles, Kendal, LA9 4TS

    www.thekittenandthegoat.co.uk

    Facebook – Instagram – Pinterest – search for The Kitten and The Goat


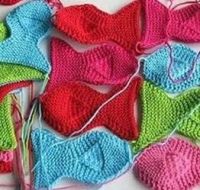
  18.  Fish Shapes Blankie / Cushion / throw / Runner

    fish

    Work a small fish with 1 strand of double knitting on 4mm knitting needles.  Takes about 5g of yarn and makes a fish 5½“ long.


    Work a larger fish with 2 strands of double knitting / or 1 strand of chunky on 6mm knitting needles.  Takes about 12g of yarn and makes a fish 8“ long.


    Work a huge fish with super chunky yarn on 9mm knitting needles. 

    Starting at the nose – make as many fish as you like

    Cast on 6 stitches

    Row 1: knit all stitches across row.

    From this point forward – slip the first stitch of the row purl wise.

    Row 2: slip 1, knit into the front and then the back of the next stitch, knit 2, knit into the front and then the back of the next stitch, knit 1.  (8 stitches).

    Row 3: slip, knit all stitches to end of row.

    Row 4: slip 1, knit into the front and then the back of the next stitch, knit 4, knit into the front and then the back of the next stitch, knit 1.  (10 stitches).

    Row 5: slip, knit all stitches to end of row.

    Row 6: slip 1, knit into the front and then the back of the next stitch, knit 6, knit into the front and then the back of the next stitch, knit 1.  (12 stitches).

    Row 7: slip, knit all stitches to end of row.

    Row 8: slip 1, knit into the front and then the back of the next stitch, knit 8, knit into the front and then the back of the next stitch, knit 1.  (14 stitches).

    Row 9: slip, knit all stitches to end of row.

    Row 10: slip 1, knit into the front and then the back of the next stitch, knit 10, knit into the front and then the back of the next stitch, knit 1.  (16 stitches).

    Row 11: slip, knit all stitches to end of row.

    Row 12: slip 1, knit into the front and then the back of the next stitch, knit 12, knit into the front and then the back of the next stitch, knit 1.  (18 stitches).

    Row 13: slip, knit all stitches to end of row.

    Row 14: slip 1, knit into the front and then the back of the next stitch, knit 14, knit into the front and then the back of the next stitch, knit 1.  (20 stitches).

    Row 15: slip, knit all stitches to end of row.

    Row 16: slip, knit all stitches to end of row.

    Row 17: slip, knit 4, purl 10, knit 5.

    Row 18: slip, knit 4, knit 2 together through the back of the loops, knit 6, knit 2 together, knit 5.  (18 stitches).

    Row 19: slip, knit 4, purl 8, knit 5.

    Row 20: slip, knit 4, knit 2 together through the back of the loops, knit 4, knit 2 together, knit 5.  (16 stitches).

    Row 21: slip, knit 4, purl 6, knit 5

    Row 22: slip, knit 4, knit 2 together through the back of the loops, knit 2, knit 2 together, knit 5.  (14 stitches).

    Row 23: slip, knit 4, purl 4, knit 5.

    Row 24: slip, knit 4, knit 2 together through the back of the loops, knit 2 together, knit 5.  (12 stitches).

    Row 25: slip, knit 4, purl 2, knit 5.

    Row 26: slip, knit 4, knit 2 together, knit 5.  (11 stitches).

    Row 27: slip, knit all stitches to end of row.

    Row 28: slip, knit 4, knit 2 together, knit 4.  (10 stitches).
    Row 29: slip, knit all stitches to end of row.

    Row 30: slip, knit 3, knit 2 together, knit 4.  (9 stitches).

    Row 31: slip, knit all stitches to end of row.

    Row 32: slip, knit all stitches to end of row.

    Row 33: slip, knit all stitches to end of row.

    Row 34: slip 1, knit into the front and then the back of the next stitch, knit 5, knit into the front and then the back of the next stitch, knit 1.  (11 stitches.

    Row 35: slip, knit all stitches to end of row.

    Row 36: slip 1, knit into the front and then the back of the next stitch, knit 6, knit into the front and then the back of the next stitch, knit 1.  (13 stitches).

    Row 37: slip, knit all stitches to end of row.

    Row 38: slip 1, knit into the front and then the back of the next stitch, knit 7, knit into the front and then the back of the next stitch, knit 1.  (15 stitches).

    Row 39: slip, knit all stitches to end of row.

    Row 40: slip 1, knit into the front and then the back of the next stitch, knit 11, knit into the front and then the back of the next stitch, knit 1.  (17 stitches).

    Row 41: slip, knit all stitches to end of row.

    Row 42: slip 1, knit into the front and then the back of the next stitch, knit 13, knit into the front and then the back of the next stitch, knit 1.  (19 stitches).

    Row 43: slip, knit all stitches to end of row.

    Row 44: slip 1, knit into the front and then the back of the next stitch, knit 15, knit into the front and then the back of the next stitch, knit 1.  (21 stitches).

    Row 45: slip, knit all stitches to end of row.

    Row 46: slip 1, knit into the front and then the back of the next stitch, knit 17, knit into the front and then the back of the next stitch, knit 1.  (23 stitches).

    Row 47: slip, knit all stitches to end of row.

    Cast off


    Knit enough fish to cover the size you want your project to be.  Sew the very edges of the fish together through the slipped stitch, putting the fish in different directions for each row.


    * I use quality 100% acrylic Double Knitting yarn for all my knitting.  If you use a natural or a wool mix yarn you will need more.


    The Kitten and The Goat

    9, New Shambles, Kendal, LA9 4TS


    The Kitten and The Goat

    9, New Shambles, Kendal, LA9 4TS

    www.thekittenandthegoat.co.uk

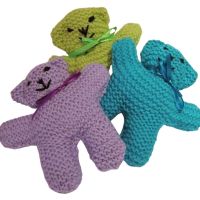
  19. knitting with kitten - teddy pattern - no background 1 Ready Teddy Go

    You will need:

    1 pair of 4mm needles

    Double Knitting yarn

    Toy stuffing

    Scraps of yarn or embroidery thread for face

    Ribbon for bow

    Large blunt needle to sew up


    You will find helpful:

    A row counter

    Garter stitch used throughout (knit every row)
    Method: start at the legs

    With 4mm knitting needles, cast on 8 stitches.

    work 16 rows, knit all stitches across rows.
    Break off yarn, leave stitches on needle.

    Cast on 8 stitches and work 16 rows the same to form the other leg.


    Body – push the 2 legs next to each other on the same needle and knit across all stitches of both legs (16 stitches).

    Work 8 rows, knit all stitches across rows.


    Arms - Cast on 8 stitches at beginning of next 2 rows (32 stitches).
    Work 8 rows, knit all stitches across rows.


    Head - Cast off 8 stitches at beginning of next 2 rows.
    Now work 38 rows on these 16 stitches, knit all stitches across rows.


    Arms - Cast on 8 stitches at beginning of next 2 rows.
    Work 8 rows, knit all stitches across rows.


    Body - Cast off 8 stitches at beginning of next 2 rows.
    Work 8 rows, knit all stitches across rows.

     Legs - Using only the first 8 stitches, knit 16 rows, knit all stitches across rows.

    Then cast off these 8 stitches.
    Return to remaining 8 stitches and knit 16 rows, knit all stitches across rows. and then cast off.

    Making up.

    Fold knitted piece in half lengthways. The fold becomes the top of the head.
    Join seam around teddy, leave a small gap between the legs.


    mattress stitch


    Backstitch a diagonal line across corner of head to form ears and pull to make shape.
    Stuff body and slip stitch closed area left for stuffing.
    Embroider a face on teddy.
    Take a double thickness of yarn and thread around neck, going in every few stitches, (making sure there are no loops that little fingers can get into).
    Draw up yard tightly to form neck and secure ends. Tie a ribbon around neck to finish

    Take one step further –

    -       Add a scarf - With same needles and thickness of yarn, cast on 60 stitches.
    Knit 6 rows and then cast off. Tie round teddy’s neck and secure in place if being given to a small child

    -       Knit in stocking stitch – that is 1 row of knit – 1 row of purl

    -       Knit the various parts in different colours to look like clothes – start with a couple if lines in black for the shoes – body colour for the legs – colour for shorts – change colour for shirt (keeping ends of arms the same colour as the legs) – knit head in body colour – repeat on the other side

    -       Add a felt Santa for Christmas – or a princess crown

    -       Work in chunky yarn on 6mm needles for a bigger, thicker toy

    -       Work in super chunky on 8mm or 9mm for a large toy


    Original work produced by – copyright and rights owned by

    The Kitten and The Goat, 9 New Shambles, Kendal Cumbria

    www.thekittenandthegoat.co.uk

    Facebook / YouTube / Instagram / Pinterest – search Kitten and Goat


  20. sofa socks  Cosy Sofa Socks

    8mm knitting needles

    2 x 100g ball super chunky yarn

    Size 3 – 4 (Size 5 – 6) (Size 7 – 9)

    Start at the cuff and cast on 20 (22, 24) stitches

    Work rib row: *knit 1, purl 1 – repeat from * to end of row

    Work 10 rows

    Work 12 (14, 16 ) rows in a knit stitch

    Heel shaping

    Row 1: knit 6, turn work round, slip 1, knit 4, knit into the front then the back of the next stitch.  21 (23, 25) stitches

    Row 2: knit across all stitches

    Row 3: knit 6, turn work round, slip 1, knit 4, knit into the front then the back of the next stitch.  22 (24, 26) stitches

    Row 4: knit across all stitches

    Row 5: knit 6, turn work round, slip 1, knit 4, knit into the front then the back of the next stitch.  23 (25, 27) stitches

    Row 6: knit across all stitches

    Row 7: knit 6, turn work round, slip 1, knit 4, knit into the front then the back of the next stitch.  24 (26, 28) stitches

    Row 8: knit across all stitches

    Row 9: knit 6, turn work round, slip 1, knit 4, knit into the front then the back of the next stitch.  25 (27, 29) stitches

    Row 10: knit across all stitches

    Row 11: knit 6, turn work round, slip 1, knit 4, knit into the front then the back of the next stitch.  26 (28, 30) stitches

    Row 12: knit across all stitches

    Stop here for the small size and move on to the decrease

    For the medium and large sizes – keep working

    Row 13: knit 6, turn work round, slip 1, knit 4, knit into the front then the back of the next stitch.  (29, 31) stitches

    Row 14: knit across all stitches

    Row 15: knit 6, turn work round, slip 1, knit 4, knit into the front then the back of the next stitch.   (30, 32) stitches

    Row 16: knit across all stitches

    Stop here for the medium size and move on to the decrease

    For the large size – keep working

    Row 17: knit 6, turn work round, slip 1, knit 4, knit into the front then the back of the next stitch.  33 stitches

    Row 18: knit across all stitches

    Row 19: knit 6, turn work round, slip 1, knit 4, knit into the front then the back of the next stitch.  34 stitches

    Row 20: knit across all stitches

    Decrease rows

    Row 1: knit 2 together, knit 5, turn work round, slip 1, knit 5. 25 (29, 33) stitches

    Row 2: knit across all stitches

    Row 3: knit 2 together, knit 5, turn work round, slip 1, knit 5. 24 (28, 32) stitches

    Row 4: knit across all stitches

    Row 5: knit 2 together, knit 5, turn work round, slip 1, knit 5. 23 (27, 31) stitches

    Row 6: knit across all stitches

    Row 7: knit 2 together, knit 5, turn work round, slip 1, knit 5. 22 (26, 30) stitches

    Row 8: knit across all stitches

    Stop here for the small size

    Keep decreasing for the medium and large sizes

    Row 9: knit 2 together, knit 5, turn work round, slip 1, knit 5. (25, 29) stitches

    Row 10: knit across all stitches

    Row 11: knit 2 together, knit 5, turn work round, slip 1, knit 5. (24, 28) stitches

    Row 12: knit across all stitches

    Stop here for the medium size

    Keep decreasing for the large size

    Row 13: knit 2 together, knit 5, turn work round, slip 1, knit 5. (27) stitches

    Row 14: knit across all stitches

    Row 15: knit 2 together, knit 5, turn work round, slip 1, knit 5. (26) stitches

    Row 16: knit across all stitches

    Foot

    Row 1: knit 2 together, knit 18 (20, 22), knit 2 together.  20 (22, 24) stitches

    Row 2: knit across all stitches

    Row 3: knit across all stitches

    Row 4: knit 2 together, knit 16 (18, 20), knit 2 together.  18 (20, 22) stitches

    Row 5: knit across all stitches

    Row 6: knit across all stitches

    Row 7: knit 2 together, knit 14 (16, 18), knit 2 together.  16 (18, 20) stitches

    Stop here for the small size – shape the toe

    Keep decreasing for the medium and large sizes

    Row 8: knit across all stitches

    Row 9: knit across all stitches

    Row 10: knit 2 together, knit (14, 16), knit 2 together.  (16, 18) stitches

    Stop here for the medium size – shape the toe

    Row 11: knit across all stitches

    Row 12: knit across all stitches

    Keep decreasing for the large size

    Row 13: knit 2 together, knit (14), knit 2 together.  (16) stitches – shape the toe

    Shape the toe

    Work 4 rows in a knit stitch

    Row 5: knit 2 stitches together across the row.  8 stitches

    Row 5: knit 2 stitches together across the row.  4 stitches

    Leave a 60cm tail and cut the yarn

    Thread the yarn onto a very large eye tapestry needle

    Loop the needle through the stitches – pull tight – weave the yarn round the toe again and secure

    Sew up the back of the sock with mattress stitch and finish off the yarn
     

  21. Asyometric Scarf

    Picture1

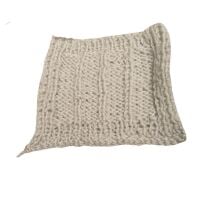
    You will need:

    3 100g balls of a Super chunky acrylic yarn (either 3 the same of 3 different)
    10mm circular knitting needle 80cm or 100cm long

     Cast on 150 stitches

    Knit 1 row
    Row 1: slip 1, knit 2 together, pass the slipped stitch over the knit stitch and off the needle, knit to the last 2 stitches, knit 2 together. (147 stitches)
    Row 2: slip 1, knit 1, pass the slipped stitch over the knit stitch and off the needle, knit to the last 3 stitches, knit 3 together. (144 stitches)

    Place a stitch marker at the beginning of row 1 so that you will always be able to tell which row to work.

    These 2 rows form the pattern.
    Repeat until you get down to 3 stitches: slip 1, knit 1, pass the slipped stitch over the knit stitch and off the needle, knit 1 – knit last 2 stitches together and finish off.

    If you are using different colours – use all of the first ball – change colour – use all of the second ball – change colour.
    You will have enough of the third ball the add a little fringe or 3 big tassels on the points.


  22. Easter Bunny with hidden treat Knitting kit

    IMG_0500

     Approximate size –  3” / 7.5cm tall


    You will need: 
    4mm knitting needles

    DK yarn
    Coloured felt for the ears and tail
    Tiny buttons or sequins for eyes
    Coloured yarn for the nose and whiskers
    Needle to sew up

    Method:-
    With no 4mm needle cast on 30 stitches
    Row 1: knit all across stitches
    Repeat row 1 for a TOTAL of 27 rows
    Cast off

    To Make up
    Fold in half, and stitch the cast on and the cast off rows together to make a tube.

    Gather one end of the tube, slip the needle through the very top of the garter stitch loops that stand a bit proud and pull tightly.  Over sew a couple of times to secure well and finish off.

    Gather the other end of the tube in the same way and fold this end right up into the tube.  Secure both gatherings together with a couple of stitches through both the thicknesses and finish off.

     Sew on the buttons or sequins for the eyes

    Sew the nose and whisker detail

    Sew on the ears and the tail details

    Stuff with an Egg

    Take a step further
    - Knit in white for a duckling – with a rounded beak.
    - Knit in fawn or grey for a mouse and add big ears and whiskers
    - Knit in yellow for a chick and add a beak and wings.
    - work in white for a sheep and add loops to the top for fluff