Free Knitting Resources

 RSS Feed

Category: Knitting with Kitten

  1. November free pattern - lace ankle warmers

    Posted on

    You will need:

    4mm knitting needles

    DK yarn – I am using the James Brett Shhh yarn – it’s a lightweight brushed dk that goes a really long way and gives a really light and delicate effect.

    Large blunt needle to sew up

    The circumference of these is about 10” – depends on the yarn you use and how tightly you work.  If you want a smaller round – reduce stitches in counts of 7 – if you want larger add stitches in counts of 7.

     To make

    With 4mm knitting needles – working top down - cast on 60 stitches.

     Rib edge

    Row 1: knit 1, purl 1 – repeat to end of row.

    Repeat row and work about 1”.


    Work the lace pattern:

    Row 1: knit.  While you are working along the row – increase 3 stiches evenly spaced.  (63 stitches).

    Row 2: purl.

    Row 3: (knit 1, yarn over, bring yarn to the front to purl 1, purl 3 together, purl 1, without taking the yarn back, knit 1) repeat to end of row.

    Row 4: purl.

    Repeat these 4 rows and work about 5”.  You can go longer if you wish.

    Work a few rows of the knit 1 row – purl 1 row before starting the rib.

    Work the ruffle.

    Row 1: into every stitch work – knit, yarn over, knit, yarn over, knit.  That means – knit into the stitch – but don’t slip it off the needle, bring the yarn around over the needle to create another stitch, knit into the stitch again – but don’t slip it off the needle, bring the yarn around over the needle to create another stitch, knit in to the stitch again, now slip it off the needle – you are creating 5 stitches out of the one stitch.  (300 stitches – but don’t bother to count then – it’s not super critical if it’s over or under!).

    Row 2: purl.

    Row 3: knit.

    Work about 2” of the purl / knit rows – or more if you like a deep frill.

    Cast off loosely.

    Sew up the back seam.

    Take a step further

    • Work the leg section as long as you wish.
    • Wear pulled up – or scrunched down.
    • Make the frill less full by working 3 stitches into each stitch – less yarn hungry.
    • Miss the frill off all together.
    • Make the rib and the frill in contrast colours.
    • You may find 5 into 1 is too bulky for your yarn – try 5 then 3 into one for a less dense effect – or just 3 into 1 for a less ruffle.
    • Exaggerate the edge of the frill be knitting into the front and then the back of every stitch – then cast off.
    • Make matching wrist warmers by reducing the stitches.


  2. October pattern - eyeballs

    Posted on

    This pattern is part of the Knitting with Kitten Knitting Circle

    Knitted Eyeballs

    eyeballs

    You will need:

    4mm knitting needles

    DK yarn in black

    DK yarn in white

    DK yarn in colours

    Large blunt needle


    To make – large.

    With 4mm knitting needles and white – cast on 6 stitches.

    Row 1: purl.

    Row 2: knit into the front – then into the back of each stitch.  (12 stitches).

    Row 3: purl.

    Row 4: *knit into the front – then into the back, knit 1 – repeat from * to end of row.  (18 stitches).

    Row 5: purl.

    Row 6: *knit into the front – then into the back, knit 1 – repeat from * to end of row.  (27 stitches).

    Row 7: purl.

    Row 8: knit.

    Row 9: purl.

    Row 10: *knit into the front – then into the back, knit 2 – repeat from * to end of row.  (36 stitches).

    Row 11: purl.

    Row 12: knit.

    Row 13: purl.

    Row 14: *knit 2 together, knit 2 – repeat from * to end of row.  (27 stitches).

    Row 15: purl.

    Row 16: knit.

    Break yarn and change to a colour.

    Row 17: purl.

    Row 18: *knit 2 together, knit 1 – repeat from * to end of row.  (18 stitches).

    Row 19: purl.

    Row 20: *knit 2 together, knit 1 – repeat from * to end of row.  (12 stitches).

    Break yarn and change to black.

    Row 21: purl.

    Row 22: knit 2 together all across row.  (6 stitches).

    Break yarn – draw yarn through stitches and secure to finish.  Join the seam with the tails of the right colour – filling as you go.


    To make – small.

    With 4mm knitting needles and white – cast on 6 stitches.

    Row 1: purl.

    Row 2: knit into the front – then into the back of each stitch.  (12 stitches).

    Row 3: purl.

    Row 4: *knit into the front – then into the back, knit 1 – repeat from * to end of row.  (18 stitches).

    Row 5: purl.

    Row 6: *knit into the front – then into the back, knit 1 – repeat from * to end of row.  (27 stitches).

    Row 7: purl.

    Row 8: knit.

    Row 9: purl.

    Break yarn and change to a colour.

    Row 10: *knit 2 together, knit 2 – repeat from * to end of row.  (20 stitches).

    Row 11: purl.

    Row 12: *knit 2 together, knit 2 – repeat from * to end of row.  (15 stitches).

    Break yarn and change to black.

    Row 13: purl.

    Row 14: *knit 2 together, knit 1 – repeat from * to end of row.  (10 stitches).

    Row 15: purl 2 together all across row.

    Break yarn – draw yarn through stitches and secure to finish.  Join the seam with the tails of the right colour – filling as you go.


    Take a step further –

    • Add crochet tails at the back for sinews.
    • Use a red thread to create ‘veins’.
    • Use chunky and 6mm for a larger size.
    • Make a whole plate full as decoration.
    • Create loads – thread a string / ribbon through the middle and tie as a necklace.


    This pattern is part of The Kitten and The Goat Monthly Virtual Knitting Circle.  Sign up to our email list on the website to get a newsletter with a free pattern and access to 2 videos every month.


    The Kitten and The Goat

    9, New Shambles, Kendal, LA9 4TS

    www.thekittenandthegoat.co.uk

    Facebook – Instagram – Pinterest – search for The Kitten and The Goat


  3. September pattern - cotton bag

    Posted on

    You will need -

    Balls of cotton / acrylic (you will need more for 100% cotton)

    4mm knitting needles

    Fabric for lining – paper to make a pattern, and something to cut and sew with.


    Start at the top of the handle – work 2 sides the same.

    Cast on 13 stitches

    Row 1: knit 1, * purl 1, knit 1 – repeat from * to end of row.

    Row 2: knit 1, * knit 1, purl 1 – repeat from * to last 2 stitches, knit 2.

    Row 3: knit 1, * knit 1, purl 1 – repeat from * to last 2 stitches, knit 2.

    Row 4: knit 1, * purl 1, knit 1 – repeat from * to end of row.

    These 4 rows form the pattern. 

    Keep the pattern in this form all through the piece allowing for increasing stitches.

    Work about 60 rows for the handle – more if you want a shoulder bag.

    Increase row: work the first and the last stitches as a knit stitch. Increase 1 stitch at each end of the next row – by knitting into the front and then the back of the 2nd stitch.

    Repeat increase row 6 times - 25 stitches.

    Cast on 5 stitches at each end of the next row. 

    Work 1 straight row in the pattern.

    Cast on 5 stitches at each end of the next row. 

    Work 1 straight row in the pattern.

    Repeat the increase row if you want more width.

    Work the body of the bag as deep as you wish.  Work both sides before you cast off.

    Cast off both sides together at the bottom seam.  This gives you a stronger – neater finish.

    Use the completed bag as a guide to cut out a paper pattern

    Overlap the top handle edges slightly and stitch together.

    Adding a lining – cut the fabric using the pattern you made – adding ¼” seam allowance.

    – hem around the sides and join the handle – turn right side out – give it a good press – slip the lining inside the bag – turn the raw edges under and slip stitch to the outer.


  4. August pattern - doggie bookmark

    Posted on

    20240801_140502 Doggie bookmark

    You will need:

    DK yarn for the dog’s body – brown / black / white / cream / grey

    DK yarn in 2 different colours for the dog’s coat (A and B)

    4mm knitting needles


    Bottom leg – make 2: with body colour, cast on 2 stitches, knit into the front and then the back of both stitches.  (4 stitches).

    Work 2 rows in plain knitting.

    Next row: knit into the front and then the back of the first stitch, knit 1, knit the last 2 stitches together.

    Work 3 rows in plain knitting.

    Repeat the last 4 rows twice more, break yarn and leave the stitches on the end of the needle for now.


    Line up the legs on the needle so that they shape outwards.

    Knit across one leg, turn the work around and cast on 4 stitches, turn the work back and knit across the other leg.  (12 stitches).

    Next row: knit into the front and then the back of the first stitch, knit to last stitch, knit into the front and then the back of the last stitch.  (14 stitches).

    Work 10 rows in plain knitting. 

    Next row: knit 2 together, knit to last 2 stitches, knit 2 together.  Break yarn.  (12 stitches).


    Coat

    Join in 1st coat colour (A) and Work 2 rows in plain knitting.

    Row 1: knit - *1 A, 1 B – work from * to end of row

    Row 2: purl - *1 B, 1 A - work from * to end of row

    Row 3: knit - *1 B, 1 A – work from * to end of row

    Row 4: purl - *1 A, 1 B – work from * to end of row

    Repeat the last 4 rows until you have worked about 10cms, break yarn B

    With A work 2 rows in plain knitting.


    Personally, I find it helpful to take a break here to sew in all the tails and give the work a good press with an iron so you can see the shape better.


    Paws: with body colour and right side facing, knit 3, turn and work on these 3 stitches only

    Knit 2 rows.

    Increase row: knit 1, knit into the front and then the back of the next stitch, knit 1 stitch.  (4 stitches).

    Knit 7 rows in plain knitting.

    Increase row: knit 1, knit 2 together, knit 1 stitch.  (3 stitches).

    Knit 2 rows.

    Cast off stitches.

    Move the body stitches onto the other needles so that you can rejoin the body colour and work a 2nd paw to match.


    Back of head – with right side of body facing, and body colour, rejoin yarn – knit 2 rows.

    Next row: knit into the front and then the back of the first stitch, knit to last stitch, knit into the front and then the back of the last stitch.  (8 stitches).

    Work 3 rows in plain knitting.

    Repeat the last 4 rows until you have 12 stitches on the needle – mark each end of the last increase row – and work a further 3 rows in plain knitting.


    Ears: - working on the same head stitches – shape for ears – knit 4 stitches, turn and work on just these stitches - knit 2 together, knit 2 together, turn work - knit 2 together, break yarn and finish.

    Slip the head stitches onto the other needle so you can work an ear to match on the other side.


    Face: with right side facing, rejoin body yarn to centre 4 stitches.

    Increase row: knit into the front and then the back of the first stitch, knit to last stitch, knit into the front and then the back of the last stitch.  (6 stitches).

    Knit 1 row.

    Repeat last 2 rows until you have 12 stitches – mark each end of the last increase row – and work a further 5 rows in plain knitting - mark each end of the last row.

    Knit to last stitch, turn

    Slip 1 stitch, knit to last stitch, turn

    Slip 1 stitch, knit 8, turn

    Slip 1 stitch, knit 7, turn

    Slip 1 stitch, knit 6, turn

    Slip 1 stitch, knit 5, turn

    Slip 1 stitch, knit 4, turn

    Slip 1 stitch, knit 3, turn

    Slip 1 stitch, knit to end of row

    Knit across all stitches.  Break yarn and thread through but don’t pull tight yet.

    To make up

    Fold head – matching up the markers and sew down the sides and across the ears.  Add a little stuffing to the head.  Add a little stuffing to the chin shape – pull tight and sew under the face.  Embroider some eyes.

    Neaten all the loose ends.


    Tail: with body colour pick up 4 stitches at the bottom of the centre of the coat.  Knit until 3-4” long.

    knit 2 together, knit 2 together.

    knit 2 together.


    Take a step further:

    • You can make the jumper part in all sorts of patterns
      • Work it plain
      • Work in stripes
      • Work in a moss stitch
      • Make the jumper body any length you like
      • Go wild with doggie colours
  5. July Free Pattern - Bee Hanger

    Posted on

    bee hanger

    Bee Hanger

    You will need:

    4mm knitting needles

    DK yarn in black – about 5g

    DK yarn in yellow – about 2g

    Ribbon for hanger – 50cm

    Ribbon / fabric for wings

    Eyes

    Sewing thread and sharp needle

    Large blunt needle


    Tip – leave long tails when changing colour and use them to sew the body together.

    Or – carry the yarn up the side of the work as you progress.


    To make

    With 4mm knitting needles and black – cast on 8 stitches.

    Row 1: purl.

    Row 2: knit into the front – then into the back of each stitch.  (16 stitches).

    Row 3: purl.

    Row 4: knit into the front – then into the back of each stitch.  (32 stitches).

    Row 5: purl.

    Row 6: knit.

    Row 7: purl.

    Row 8: knit.

    Row 9: purl.

    Row 10: knit.  Drop black yarn.

    Row 11: start in yellow yarn - purl.

    Row 12: knit.

    Row 13: purl.

    Row 14: knit.  Drop yellow yarn.

    Row 15: start in black yarn - purl.

    Row 16: knit.

    Row 17: purl.

    Row 18: knit.  Drop black yarn.

    Row 19: start in yellow yarn - purl.

    Row 20: knit.

    Row 21: purl.

    Row 22: knit.  Drop yellow yarn.

    Row 23: start in black yarn - purl.

    Row 24: knit.

    Row 25: purl.

    Row 26: knit 2 stitches together across all of row.  (16 stitches).

    Row 27: purl 2 stitches together across all of row.  (8 stitches).

    Row 28: knit 2 stitches together across all of row.  (4 stitches).

    Break yarn leaving a long tail to sew up – draw end through the loops – tighten and secure.


    Use the tail to sew up the edges.

    Sew on the buttons for the eyes.

    Fold the edges of the fabric / net / ribbon to the middle and sew to create the wings.

    Cut 2 different lengths of ribbon - fold in half and sew on to the back.


    Take a step further

    • Make the stripes pink or blue for a new baby bee hanger.
    • Make several and string on ribbon as a garland.

    Make with glitter or ra

  6. Pattern - June - Flower crown

    Posted on

    flower crowm plain 

    You will need:

    Oddments of dk yarn

    4mm knitting needles

    Needle to sew up

    Ribbon or headband to attach the flowers to

    Beads / sequins to decorate if you want.


    Method:

    Makes 1 flower shape – make as meany as you wish in all sorts of colours and textures.

    Cast on 96 stitches.

    Row 1: knit.

    Row 2: *knit 2 together, knit 2 together, (yarn over, knit 1) 4 times, knit 2 together, knit 2 together – repeat from * to end of row. (72 stitches)

    Row 3: knit.

    Row 4: knit.

    Row 5: *knit 2 together, knit 2 together, (yarn over, knit 1) 4 times, knit 2 together, knit 2 together – repeat from * to last 2 stitches, knit 2.  (54 stitches).

    Row 6: purl.

    Row 7: *knit 1, knit 2 together – repeat from * to end of row.  (36 stitches).

    Row 8: *purl 1, purl 2 together – repeat from * to last stitch, purl 1.  (24 stitches).

    Row 9: knit 2 together to end of row.  (12 stitches).

    Cast off tightly – leave a 12” tail to sew up.


    ASSEMBLY:
    Starting at the last and smallest petal made, roll up your flower keeping everything as even as possible. Make sure the base is fairly flat.


    Measure a wide ribbon to fit 2/3 round the head.  Gather the ends round a short piece of elastic so that the band fits snugly round the head.  Sew the flower shapes on as densely as you wish.


    Take one step further –

    -       Use as clusters in home decor – cushion covers - curtain tie backs – corner accents.


    This pattern is part of The Kitten and The Goat Monthly Virtual Knitting Circle.  Sign up to our email list on the website to get a newsletter with a free pattern and access to 2 videos every month.


    The Kitten and The Goat

    9, New Shambles, Kendal, LA9 4TS

    www.thekittenandthegoat.co.uk

    Facebook – Instagram – Pinterest – search for The Kitten and The Goat


  7. May free pattern - Bunny binkie

    Posted on

    This pattern is part of the Knitting with Kitten Knitting Circle

    Bunnie Binkie

     bunny binkie

    You will need:

    4mm knitting needles

    DK yarn

    Toy filling

    Needle to sew up

    Embroidery or felt for face


    You may useful: row counter – stitch markers

    Method:

    Cast on 6 stitches.

    Row 1: knit into the front and then into the back of each of the stitches.  (12 stitches).

    Row 2: purl.

    Row 3: knit into the front and then into the back of each of the stitches.  (24 stitches).

    Row 4: purl.

    Row 5: knit into the front and then into the back of each of the stitches.  (48 stitches).

    Row 6: purl.

    Row 7: (knit into the front and then into the back of stitch, knit 6) 2 times, knit into the front and then into the back of stitch, knit 12, (knit into the front and then into the back of stitch, knit 6) 3 times.  (54 stitches).

    Row 8: purl.

    Row 9: (knit into the front and then into the back of stitch, knit 7) 2 times.  knit into the front and then into the back of stitch, knit 14, (knit into the front and then into the back of stitch, knit 7) 2 times.  (60 stitches).

    Keep the knit row, purl row pattern until you get to

    Row 17: (knit 2 together, knit 7) 2 times, knit 2 together, knit 14, (knit 2 together, knit 7) 2 times, knit 2 together, knit 6.  (54 stitches).

    Keep the knit row, purl row pattern until you get to

    Row 21: (knit 2 together, knit 6) 2 times, knit 2 together, knit 12, (knit 2 together, knit 6) 2 times, knit 2 together, knit 6.  (48 stitches).

    Keep the knit row, purl row pattern until you get to

    Row 25: (knit 2 together, knit 5) 2 times, knit 2 together, knit 10, (knit 2 together, knit 5) 2 times, knit 2 together, knit 6.  (42 stitches).

    Row 26: purl.

    Row 27: (knit 2 together, knit 4) 2 times, knit 2 together, knit 8, (knit 2 together, knit 4) 2 times, knit 2 together, knit 6.  (36 stitches).

    Row 28: purl.

    Row 29: (knit 2 together, knit 3) 2 times, knit 2 together, knit 6, (knit 2 together, knit 3) 2 times, knit 2 together, knit 6.  (30 stitches).

    Row 30: purl.

    Row 31: (knit 2 together, knit 2) 2 times, knit 2 together, knit 4, (purl 2 together, purl 2) 2 times, purl 2 together, purl 6.  (24 stitches).

    Row 32: purl.

    Row 33: (knit 2 together, knit 1) 2 times, knit 2 together, knit 2, (knit 2 together, knit 1) 2 times, knit 2

    together, knit 6.  (18 stitches).

    Row 34: purl 6, (purl 2 together). (12 stitches).

    Row 35: knit 2 together 6 times. (6 stitches).

    Pull your through remaining stitches and finish off securely leaving a long tail to sew up the head and secure the bunny to the binkie.


    Embroider the face.  The head has a slight shaping – the flatter section is the face.


    Ears.

    Pick up 5 stitches directly from the face where you want your ears to start.

    Row 1: knit into the front and then into the back of stitch, knit 1, knit into the front and then into the back of stitch, knit 1, knit into the front and then into the back of stitch. (8 stitches).

    Row 2: knit into the front and then into the back of stitch, knit to last stitch, knit into the front and then into the back of stitch. (10 stitches).

    Row 3: knit into the front and then into the back of stitch, knit to last stitch, knit into the front and then into the back of stitch. (12 stitches).


    The blanket is worked flat in moss stitch. Measures 16” – (or 18”).

    Cast on 59 (75) stitches. 

    Row 1: slip 1, (knit 1, purl 2) until last stitch, purl 1.

    Work until blanket measures 16 (18)”. Cast off loosely.


    This pattern is part of The Kitten and The Goat Monthly Virtual Knitting Circle.  Sign up to our email list on the website to get a newsletter with a free pattern and access to 2 videos every month.


    The Kitten and The Goat

    9, New Shambles, Kendal, LA9 4TS

    www.thekittenandthegoat.co.uk

    Facebook – Instagram – Pinterest – search for The Kitten and The Goat


  8. Monthly Pattern - April - Net Curtains

    Posted on

    ribbon stitch square

    You will need:

    Cotton yarn – or a cotton / acrylic mix

    6mm knitting needles – you can go larger if you want a more lace effect

    This is a reworking from a pattern I saw by Naomi Parkhurst while looking for an open work mesh.  I have simplified the method for you to follow.

    Cast on stitches in multiples of 4.

    Row 1: *knit 2 stitches together, yarn round needle twice, knit 2 stitches together – repeat from * to end of row.

    Row 2: *knit 1, (knit 1, purl 1) in yarn round needle loops, knit 1 – repeat from * to end of row.

    Row 3: knit.


    Cast on 40 stitches will give you 10”

    Cast on 160 stitches and work to cover a door in the summer – they look amazing – you get the fresh breeze and it keeps the bugs out.

    Take one step further –

    -       Using the maths you can create any length curtain – work a narrow café frill – or a whole door curtain.

    -       Use the same technique to make a shawl – or a scarf.

    -       Make a top by sewing into a tube and adding straps.


    This pattern is part of The Kitten and The Goat Monthly Virtual Knitting Circle.  Sign up to our email list on the website to get a newsletter with a free pattern and access to 2 videos every month.


  9. Summer Star Bunting

    Posted on

    This pattern is part of the Knitting with Kitten Knitting Circle

    star bunting on shelf

    Summer Picnic Bunting Knitting Kit 

    You will need:-

    Scraps of double knitting yarns

    4mm knitting needles

    Ribbon or string to hang

    Needle to sew in the tails


    You may find helpful – a row counter – beads / sequins to decorate if you wish


    For each star:-

    Cast on 5 stitches.

    Row 1: (Knit 1 but don’t slip the loop off the needle, bring the yarn forward, then knit again into the same stitch, then slip the original loop off) into each stitch.  Work the stitches loosely.  15 stitches.

    Row 2: knit.

    Row 3: (knit 1, yarn forward, knit 1, yarn forward, knit 1) 5 times.  25 stitches.

    Row 4: Knit.

    Row 5: (Knit 1, yarn forward, knit 3, yarn forward, knit 1) 5 times.  35 stitches.

    Row 6: Knit.

    Row 7: (k1, yarn forward, k5, yarn forward, k1) 5 times – 45 stitches.

    Row 8: Knit.

    Row 9: (k1, yarn forward, k7, yarn forward, k1) 5 times – 55 stitches.

    Row 10: Knit

    Row 11: (k1, yarn forward, k9, yarn forward, k1) 5 times – 65 stitches.

    Row 12: Knit

    Row 13: (k1, yarn forward, k11, yarn forward, k1) 5 times – 75 stitches.

    Row 14: Knit.


    Shape points

    Knit 15 – turn and work on these stitches alone.

    Row 1: knit 1, knit 2 together, knit to last stitches. 3 k2tog, k1.

    Row 2: Knit.

    Repeat these 2 rows until 5 stitches remain.

    Next row. Knit.

    Finish – knit 2 together, knit 1, knit 2 stitches together. 

    Next row: Knit 3.

    End - Knit 3 together.  Finish off.

    Work other points the same way.

    Make as many as you want.

    Take a step further:-

    • Add across a ribbon as a banner.
    • Add down a ribbon as a hanger.
    • Add 3 to different lengths as a hanger.
    • Decorate with beads / sequins etc.
    • Make in chunky yarn (on 6mm needles) as a place mat.
    • Make in super chunky yarn (on 9mm needles) as a table mat.
    • Perfect for a baby’s room.
    • Red, white and blue looks amazing as a seaside theme.
    • Work in seasonal colours for Autumn and Christmas.
    • Hang from the top central point – or link the arms.
    • And I am going to say it – add a little face to the top point for starfish.
  10. Light and Lacy Shawl

    Posted on

    IMG_20230531_134250_890

    You will need

    1 x 4.5 or 5mm knitting needle

    1 x 8mm or 9mm knitting needle

    Double Knitting yarn – 2 100g balls of James Brett Shh – if you use another brand, you will probably need more as you will get so much less on the ball.

    You may find helpful: a row counter – a tape measure

    This pattern is so versatile you can literally make it in any number of stitches across – any length you fancy.  I worked it on uneven needles to get a more open lace look, but you could work it on a pair of 6mm needles and get the same the pattern – just closer together.


    My shawl measures 28”  wide x 82” long

    And took a whole ball and about ¼ of another – but I should have gone longer!


    Method:

    Using the 4.5mm needle – cast on 85 stitches onto the 9mm needle.

    Row 1: using the 4.5mm needle knit all stitches across row.

    Row 2: using the 9mm needle knit all stitches across row.

    Repeat rows 1: and 2: until you reach -

    Row 14: with the 9mm needle – knit 1 *(bring the yarn under the needle, then over the top and, knit the next stitch (creates an extra stitch) – repeat from * to end of row.

    Row 15: with the 4.5mm needle knit the first stitch, *(push the created loop from the previous row off the needle, knit the next stitch – repeat from * to end of row.

    Row 16: using the 9mm needle knit all stitches across row.


    These 16 rows form the pattern, work as much as you like and cast off very loosely.


    Take one step further –

    -       Add a fringe.

    -       For a narrower scarf cast on less stitches.

    -       Change the number of rows between stripes.

  11. Ready Teddy Go

    Posted on

    knitting with kitten - teddy pattern - no background 1 Ready Teddy Go

    You will need:

    1 pair of 4mm needles

    Double Knitting yarn

    Toy stuffing

    Scraps of yarn or embroidery thread for face

    Ribbon for bow

    Large blunt needle to sew up


    You will find helpful:

    A row counter

    Garter stitch used throughout (knit every row)
    Method: start at the legs

    With 4mm knitting needles, cast on 8 stitches.

    work 16 rows, knit all stitches across rows.
    Break off yarn, leave stitches on needle.

    Cast on 8 stitches and work 16 rows the same to form the other leg.


    Body – push the 2 legs next to each other on the same needle and knit across all stitches of both legs (16 stitches).

    Work 8 rows, knit all stitches across rows.


    Arms - Cast on 8 stitches at beginning of next 2 rows (32 stitches).
    Work 8 rows, knit all stitches across rows.


    Head - Cast off 8 stitches at beginning of next 2 rows.
    Now work 38 rows on these 16 stitches, knit all stitches across rows.


    Arms - Cast on 8 stitches at beginning of next 2 rows.
    Work 8 rows, knit all stitches across rows.


    Body - Cast off 8 stitches at beginning of next 2 rows.
    Work 8 rows, knit all stitches across rows.

     Legs - Using only the first 8 stitches, knit 16 rows, knit all stitches across rows.

    Then cast off these 8 stitches.
    Return to remaining 8 stitches and knit 16 rows, knit all stitches across rows. and then cast off.

    Making up.

    Fold knitted piece in half lengthways. The fold becomes the top of the head.
    Join seam around teddy, leave a small gap between the legs.


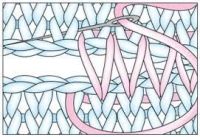
    mattress stitch


    Backstitch a diagonal line across corner of head to form ears and pull to make shape.
    Stuff body and slip stitch closed area left for stuffing.
    Embroider a face on teddy.
    Take a double thickness of yarn and thread around neck, going in every few stitches, (making sure there are no loops that little fingers can get into).
    Draw up yard tightly to form neck and secure ends. Tie a ribbon around neck to finish

    Take one step further –

    -       Add a scarf - With same needles and thickness of yarn, cast on 60 stitches.
    Knit 6 rows and then cast off. Tie round teddy’s neck and secure in place if being given to a small child

    -       Knit in stocking stitch – that is 1 row of knit – 1 row of purl

    -       Knit the various parts in different colours to look like clothes – start with a couple if lines in black for the shoes – body colour for the legs – colour for shorts – change colour for shirt (keeping ends of arms the same colour as the legs) – knit head in body colour – repeat on the other side

    -       Add a felt Santa for Christmas – or a princess crown

    -       Work in chunky yarn on 6mm needles for a bigger, thicker toy

    -       Work in super chunky on 8mm or 9mm for a large toy


    Original work produced by – copyright and rights owned by

    The Kitten and The Goat, 9 New Shambles, Kendal Cumbria

    www.thekittenandthegoat.co.uk

    Facebook / YouTube / Instagram / Pinterest – search Kitten and Goat